Here's a tutorial to help you get your Tucky started.
1. Charging Tucky
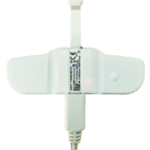
Before first use, charge your Tucky for at least 2 hours (the autonomy after 2 hours of charging is 5 days), using the USB cable provided. The red LED lights up during charging and goes out when charging is complete.
2. Download the application & create a user account
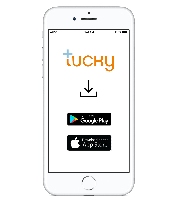
- Download the free Tucky application (On iOS: Apple Store or on Adroid: Google Play)
- Create a user account by clicking on “Register” and filling in the required fields.
- Log in with the email address and password you previously entered.
This account is necessary to monitor Tucky’s data remotely (beyond 10 meters) on other phones. This is a secure and certified health cloud (HDS).
Note: Don’t remember your password? Click on “Forgotten password” and follow the steps indicated.
3. Create a patient profile & associate Tucky
- Turn on Tucky by pressing the On/Off button; the LED will flash for 2 seconds (6 times).
- Create a patient profile, where you can enter the patient’s first and last name as well as age, gender, weight, date of birth, height and the level at which the fever alert is triggered.
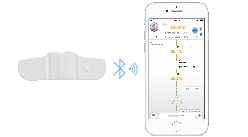
- In the settings of your phone/tablet, activate the Bluetooth® function.
Note: On iPhones, Tucky may not appear in the list of detected Bluetooth® devices. Simply turn on Bluetooth®, then exit your iPhone settings. - In the application, select a profile, approach Tucky to the phone/tablet, press the “Pair” button and accept authorization requests. A temperature will be displayed in the banner.
Note: Once associated, Tucky will reconnect as soon as it is within signal range.
PS: You can connect at least 6 Tucky at the same time on all types of smartphones (not entry-level).
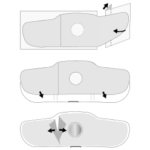
- Remove the small part of the paper backing and peel the adhesive from the remaining part.
- Stick it to the front of the Tucky, covering the edges of the probe well.
- Remove both parts of the clear film.
Below, an explicative clip:
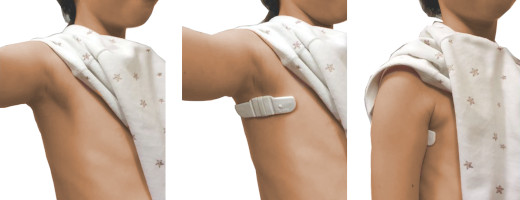
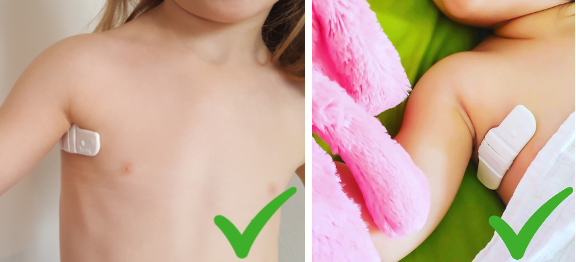
To place Tucky, observe the following points:
- The micro-USB port must face down with the tab-cap closed and the sensor skin side.
- It should be positioned as high as possible under the armpit.
Note: in case of hairiness, shave the area before applying the device.
For a better temperature measurement, wear light clothing and wait approximately 15 minutes with the arm closed until the temperature stabilizes.
6. If necessary, reinforce holding
In case of heavy sweating or physical activity, it is possible to reinforce Tucky’s support in different ways:
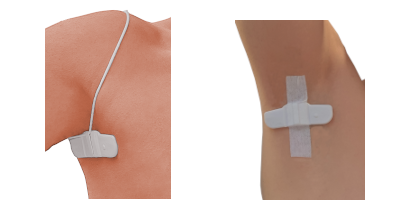
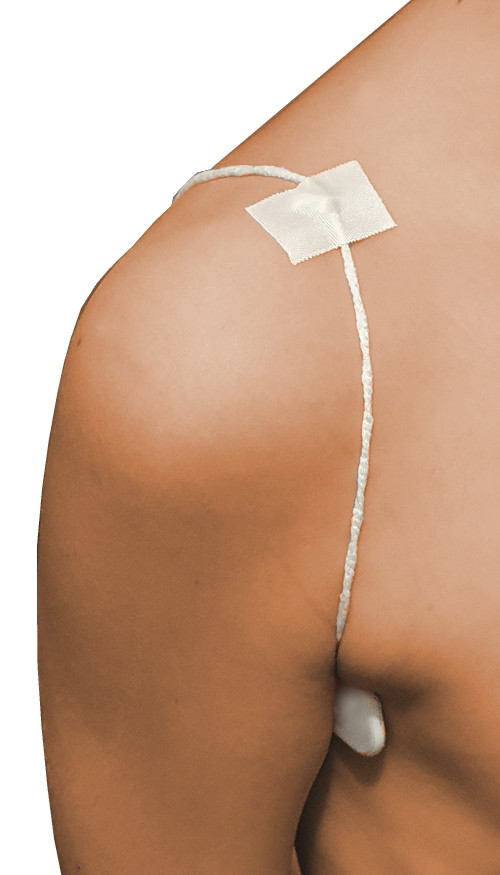
I – Addition of an elastic cord worn as a shoulder strap
- Adjust the length of the cord by tying it loosely around the shoulder
- Pass the cord through the Tucky tab
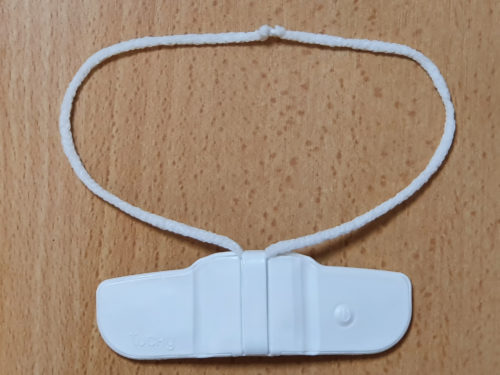
- Apply the double-sided adhesive Tucky (Adh-21)
- Thread the cord through the arm and stick Tucky under the armpit.
- Add a small adhesive to the top of the shoulder
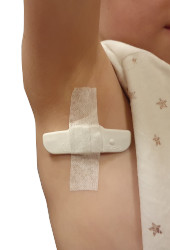
II – It is also possible to add a single-sided stretch tape (~2 x 10 cm) over Tucky :
- Apply Tucky double-sided adhesive
- Stick Tucky under the armpit
- Raise the arm and add the single-sided tape
The table below shows use cases of each solution:
Tucky adhesive alone | Tucky adhesive + adhesive strap | Tucky adhesive + elastic cord | |
Low activity holding | ✓ | ✓ | ✓ |
Comfort | ✓ | X | ✓ |
Easy cleaning | ✓ | X | ✓ |
Sweat resistance | X | ✓ | ✓ |
Long duration holding | X | X | ✓ |
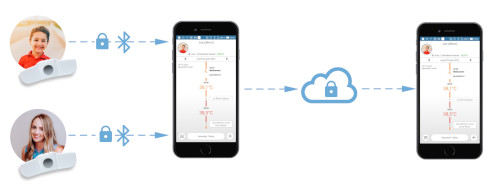
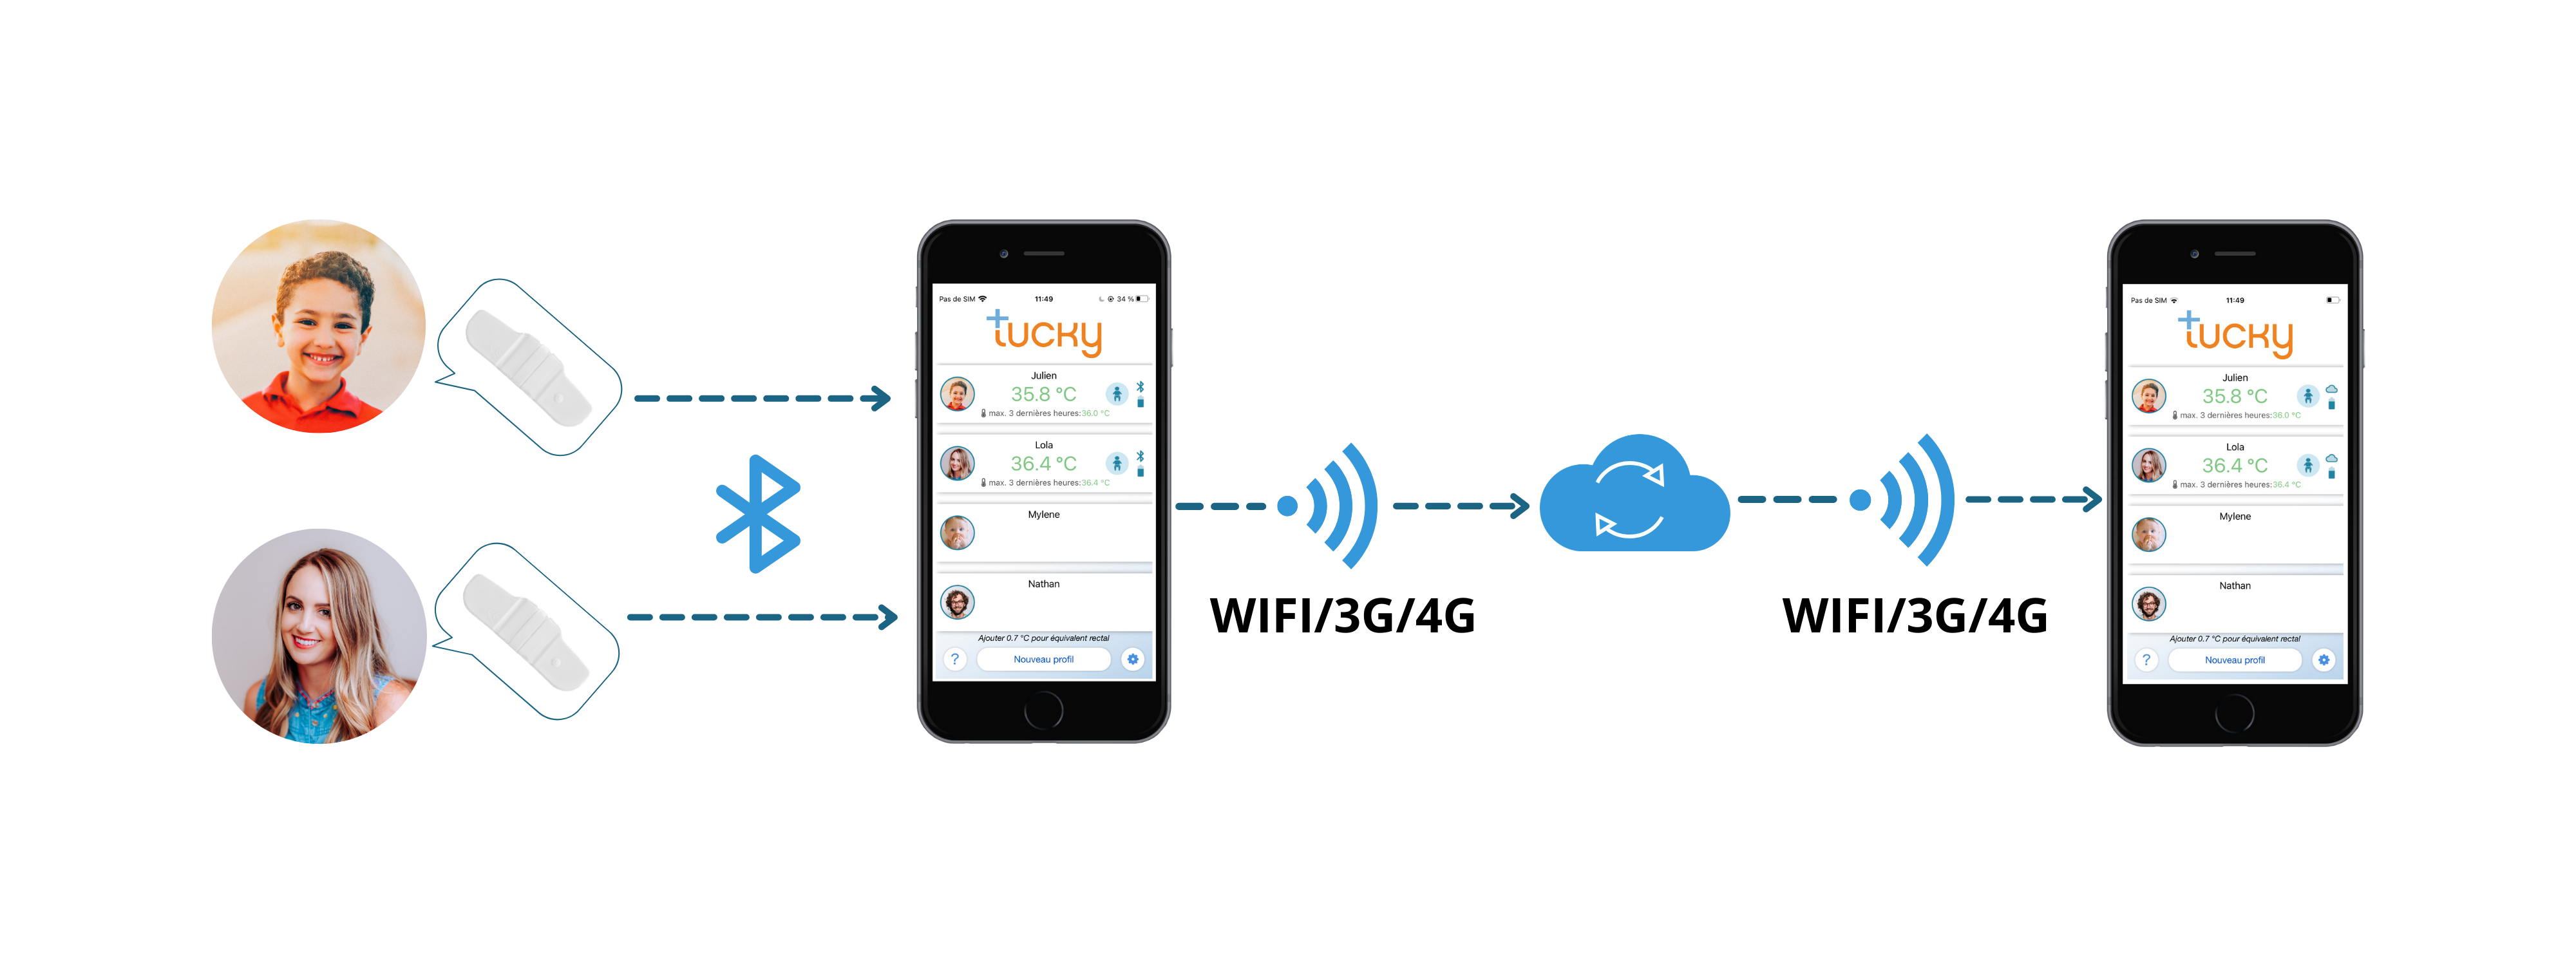
The live Bluetooth distance is about 10 meters (from room to room).
The remote connection is possible using 2 devices (tablet / smartphone) :
- 1 “relay” device, designed to stay close to the child (5-10m) and transmit data to the cloud.
- 1 for remote monitoring, which displays information from the cloud
Prerequisite:
Download the Tucky application on both devices, and connect with the same login / mdp
If you’ve ever used Tucky with one of the devices, disassociate it from all devices
Turn off Tucky
On a first phone (relay):
- Download the Tucky application, and log in with your login / password
- Associate it with Tucky (Bluetooth connection) and leave it close to the child
Note: Make sure the internet connection is working, and the battery is full.
On a second phone:
- Log in to the Tucky application with the same login/password.
- Go to the profile and refresh the view (pull down).
Note: A cloud icon indicates that the data is from the cloud. There may be a delay of a few minutes in the display.
Verification :
You can check that the alerts are transmitted to the 2 devices by pressing the “test alert” button within the profile.
Frequently asked questions
The wearable thermometer is placed under the right armpit with a dedicated double-sided adhesive.
- Make sure the patch is clean and that you have not applied any cream or oil to your child’s skin before using the thermometer.
- Peel one adhesive from its paper backing, and apply the sticky side to the side of the thermometer with the metal probe exposed, leaving the probe exposed.
- Remove the protective film from the adhesive and place Tucky as close as possible to the hollow of the right armpit, with the micro USB sensor facing down.
Please refer to the instructions for use or the tutorial.
No, Tucky should not be put in contact with water. Take Tucky off the child when bathing or showering.
La température axillaire est affichée avec un code couleur, indiquant s’il s’agit d’une température normale ou non.
– Vert : température normale (de 34,7°C à 37,3°C)
– Orange : température élevée (de 37,4°C à 38.4°C) (38.4°C = valeur par défaut)
– Rouge : température très élevée (au-delà de 38.4°C) (38.4°C = valeur par défaut)
– Gris : température non représentative (ex: bras ouvert)
L’alerte fièvre est personnalisable, en effet, la valeur « température très élevée » est réglée par défaut à 38.4°C. Il est donc possible de la modifier en fonction de son enfant dans les paramètres du profil enfant.
Use the supplied charger cable: the micro USB connector plugs into Tucky and the USB connector into a computer.
The charging time for a 5-day autonomy is 2 hours. A 10 minute charge allows you to use Tucky for about 8 hours.
When charging, the patch should never be placed on the child.
Close the cap before use.
Yes, Tucky is flexible, but it is a medical device and should be handled with care. Do not bend or twist it manually. However, its flexibility allows it to fit the body perfectly.
The application is available on Android and iOS and is compatible with most phones and tablets from IPhone 4S, Ipad 3 and Android 4.3.
No. We have developed a patented technology to limit the emission of waves from the device.
Tucky emits Bluetooth waves only 0.05% of the time and only in “Bluetooth Low Energy” mode with a wave power 250 times lower than the maximum wave emission allowed by the DECT standard applicable to digital babyphones.
It is advisable to apply Tucky as soon as symptoms of fever appear and for as long as Tucky indicates fever.
It is recommended to change the adhesive every 24 hours.
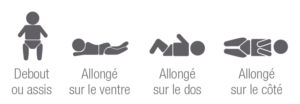
Tucky keeps you informed of your child’s position in real time with an icon that indicates whether your child is lying on their back, stomach, standing/sitting or on their side.
To ensure the functionality of the position tracking, the patch thermometer should be placed under the child’s right armpit, with the micro USB port facing down.
The range of the Bluetooth© signal is from room to room (between 5-10m), but can vary depending on the nature of the obstacles encountered.
It is nevertheless possible to monitor the temperature without distance limit with a second relay device (smartphone or tablet) connected to the same user account. This is achieved by synchronising the information on the secure health data cloud.
If the connection is interrupted, this data is not lost. It is stored by Tucky (up to 8 hours) and sent as soon as the connection is re-established.
Tucky measures temperature from 24°C to 44°C, with an accuracy of 0.1°C between 37°C and 39°C.
To correctly measure the axillary temperature, it should be placed as close as possible to the hollow of the right armpit.
It is important to know that the axillary temperature is generally 0.7°C lower than the rectal temperature.
Use a cloth or cotton wool soaked in medical alcohol to clean your patch thermometer. Remember to put the cap tab on the micro USB plug before cleaning.
Do not use water. Do not use abrasive cleaning products.
The thermometer and adhesives are made of biocompatible and hypoallergenic materials.
However, do not use this product if the patient is allergic to plastics (elastomer or silicone type) and/or adhesives. If redness of the skin occurs, wait until it disappears before using Tucky again.
If irritation occurs, remove the thermometer immediately and seek professional advice.
You can create between 6 and 12 profiles with a single login depending on the version of phone you have.
Usage questions
First of all, here is some information on the proper use of the product:
– Tucky measures the temperature of the axillary artery. It should therefore be placed as high as possible in the hollow of the armpit, and covered with a long sleeved shirt.
– The exact temperature is obtained after keeping the arm closed for about 15 minutes. It is then necessary to add 0.7°C to have the rectal equivalent.
– If the arm is opened for an extended period of time, the measured temperature may drop. In this case, refer to the last peaks and/or the “max temperature” indication in the upper left corner of the application.
In addition, the “normal” temperature (without fever) varies according to the time of day and from one person to another. We therefore recommend testing Tucky in the absence of fever to compare with fever episodes.
Connection without distance limit is possible using a 2nd smartphone.
Here is a tutorial that details how to track data without distance limits.
To modify the temperature alert threshold, simply:
- Go to the parameters of your child’s profile,
- Change the temperature to the desired one (between 37.5 et 42,0°C) and record.,
- Switching the associated Tucky off and on.
The change is effective from the next association with Tucky.
To verify that the alert sent by the phone is working properly, you must:
- Use the “test alert” button in the child’s profile.
A notification and a ringing tone are triggered on all phones connected to the same Tucky account.
Note 1 : Select the desired alert tone in “account setting” (Android only).
Note 2 : After changing the “Fever Alert” value of a child profile, switch the associated Tucky off and on again.
Yes, you have to apply the adhesive to Tucky in a certain way.
Indeed, it is composed of 2 sides:
- One side with a soft glue on the skin side so that it does not damage the skin and cause irritation
- A more robust and adherent side on the thermometer side
Here is a tutorial to help you apply the adhesive to Tucky
Technical problem
Your Tucky seems to be connecting, but you don’t see a temperature display. There may be a Bluetooth connection problem.
You can perform the “Tucky update” procedure to unlock it:
1- In the application, “dissociate” the Tucky from the child profile
2- In the Bluetooth settings of the phone, “dissociate / forget” Tucky, then turn OFF and ON bluetooth
3- Switch off the Tucky (the LED flashes 1x), then switch it on again with a long press (5 seconds): the LED flashes slowly.
4- Return to the Tucky application, go to “Home -> Account Settings -> Update Tucky” and press “Update Tucky“.
5- Go back to the child profile, and “re-associate” Tucky
Note: On other phones that usually connect to Tucky, you will need to perform the action described in point 2 (dissociate Tucky in Bluetooth settings).
An update procedure must have been interrupted, and Tucky is waiting for it to finish.
Start again by going to “Account settings -> Update Tucky”.
The normal behaviour of the Tucky during charging is as follows:
- When you connect Tucky, the LED lights up continuously
- When the charge is full, the LED turns off (the charging time can last between 5 minutes and 2 hours)
- Once connected to the application, the battery icon should display 5 bars
If you don’t have this behavior, then:
- Try another USB cable
- Use another charger or the USB port of a computer
If the problem persists, we invite you to contact us via the complaint form below indicating whether or not your LED lights up after a long press (5 seconds).
Here is the procedure to solve this problem:
1- In the app, “dissociate” the Tucky from the child profile
2- In the phone’s Bluetooth settings, “dissociate / forget” Tucky
3- Return to the app and “associate” the Tucky again
For any other unresolved problem, we invite you to contact us via the complaint form below.